The number one material required for the technique: shaving cream. Hmmmm. We use electric shavers around here. Thinking I might have to make a quick trip to the store, I asked my hubby if, by chance, he still had shaving cream anywhere in the house. Shows how observant I am. He opened the medicine cabinet and showed it to me. "I keep it around because every once in awhile, I like a close shave. I told you the other day I had bought refills for my Schick, remember?" Well, uh, sure. I remember that..... I grabbed the shaving cream and headed for my studio, aka "art nook" because it only has two walls.

I read the label. "Menthol" -- guess it can't hurt the process, right? It smells good, anyway. I went to my liquid watercolor storage drawer and pulled them out. The article called for "alcohol inks" but I decided to use drops of liquid watercolor because that is what I have in great supply and the bottles have eye droppers in each, making them easy to use.

I followed the directions and squirted a pile of the shaving cream on a Styrofoam plate. My goodness, that menthol and soap smells so fresh and clean!

I picked out two shades of blue, a yellow, and an alizarin red and dropped two drops of each onto the fluffy white shaving cream.

I stirred it around with a knife. This is about to get very messy so be sure to allow yourself enough room to work with this stuff.
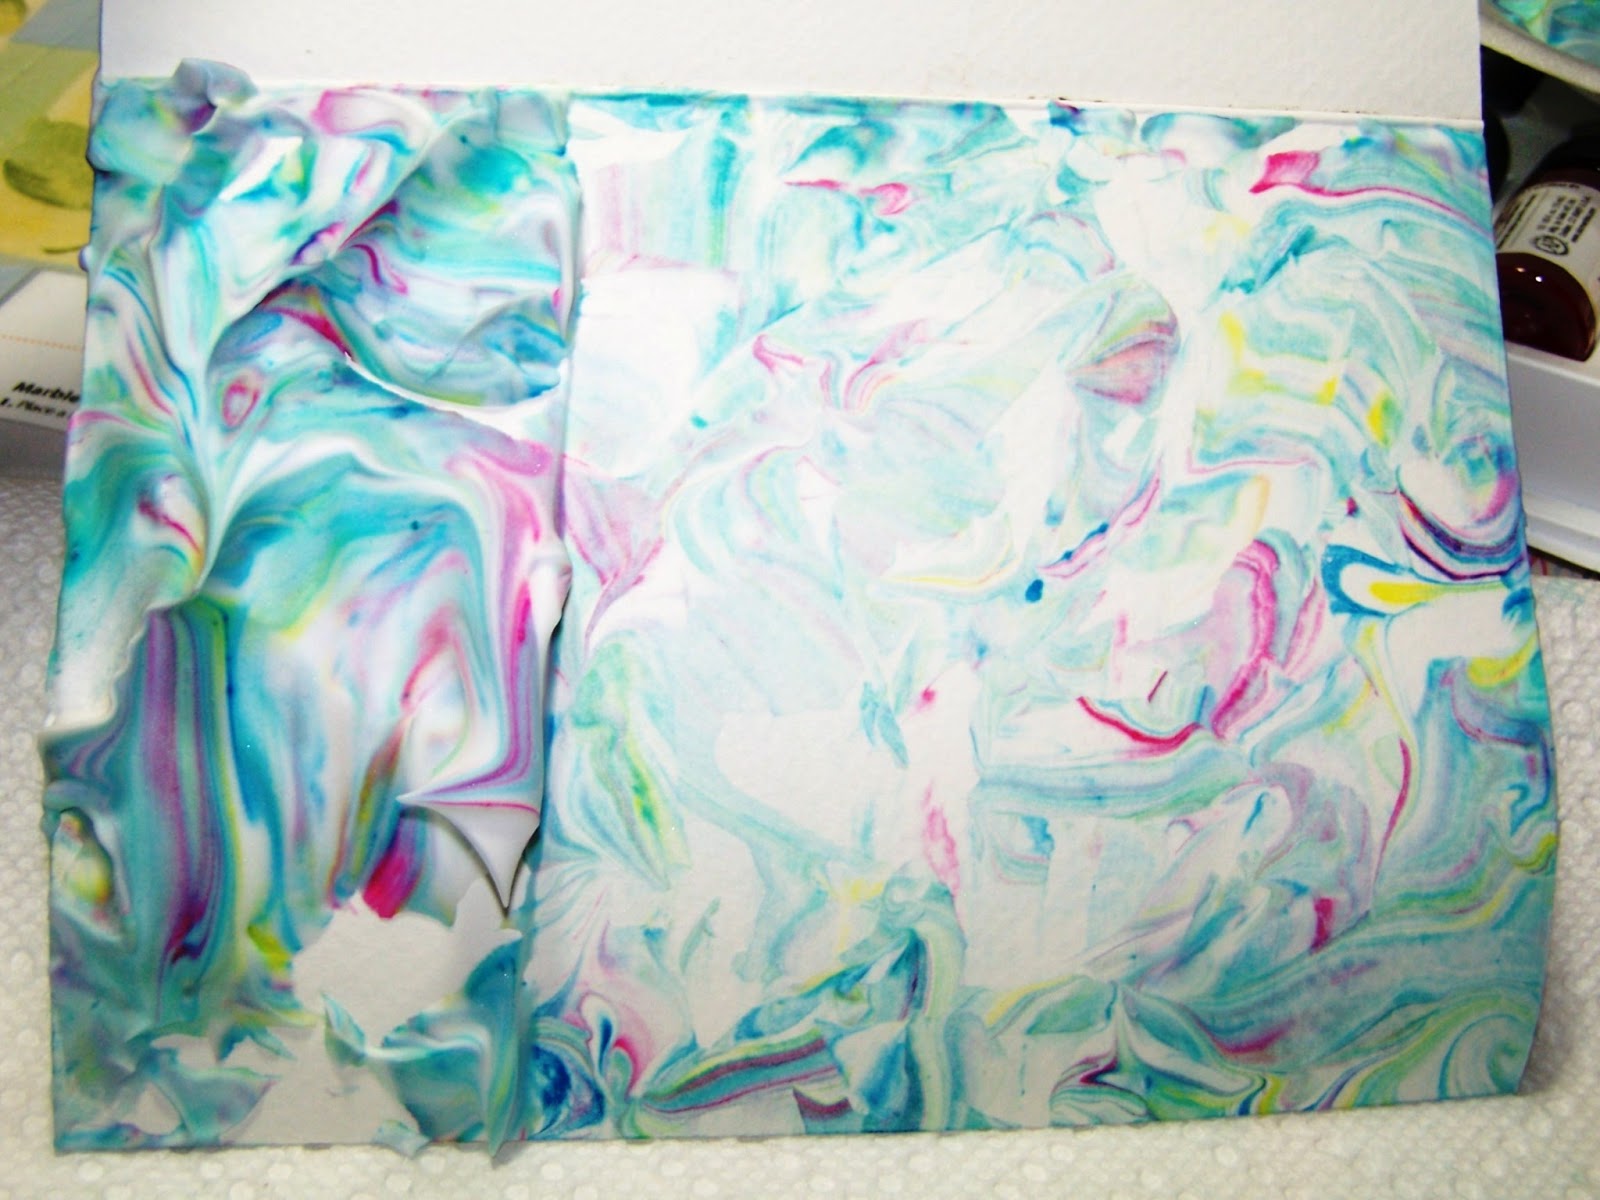
I took a watercolor card and placed it face down in the colorful mess of shaving cream. I squished it around trying to be sure the whole card was covered. The more colorful strip on the left still has the foam on it. The right has been scraped clean using an old credit card or used gift card. I also had a straight edge that I could use that really gave me a better grip. I got this stuff all over me. I even dropped the whole thing in my lap.

You may not be as clutzy as I am. Because the paper plate was so unstable, I put the next batch on foam board.
The finished product is really pretty in a tie-dye sort of way. I made another from this batch and also did a second batch using the larger flat surface of the foam core and it worked better. I used green, yellow, and orange for that one.

The flatter surface was less of a challenge and I learned that I could take a spatula to lift the stuff and put it on my card. Less messy and easier to manage.

After the card was dry, I picked out some mulberry paper , ribbon and embellishments to complete the card and bookmark.
I plan to work with the green one tomorrow while it rains cats and dogs around here and I'll post it in the next blog entry if we haven't floated away by then.
No comments:
Post a Comment
Comments are always welcome as long as they are not SPAM and are courteous.